
TNG comes with eleven templates included with the software. Template 8 is a popular one that is a good example of how easy it is to make the template your own. Here’s one example of how a TNG user has customized the template:

This diagram shows the many things that can be customized in this template:
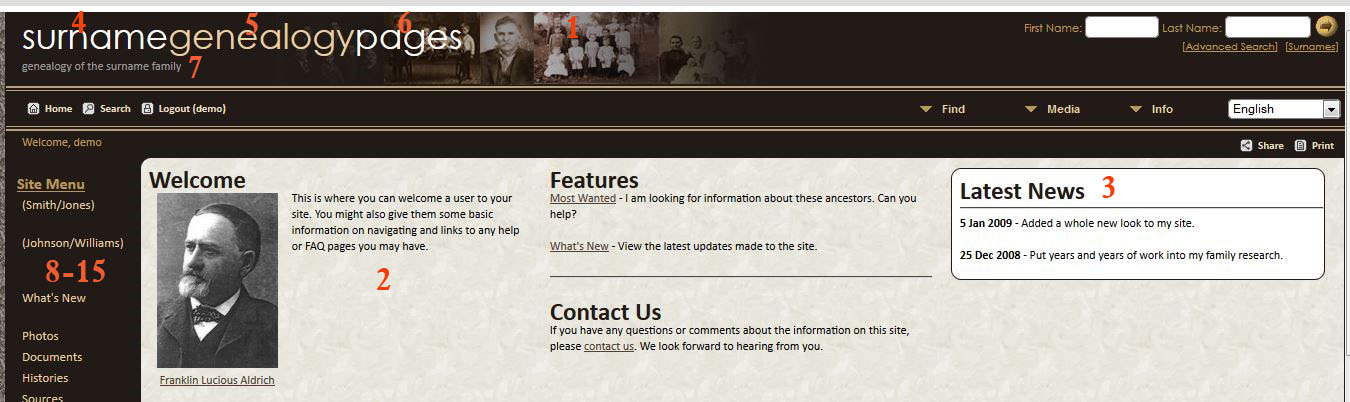
We will go through each of these and how you can adjust them:
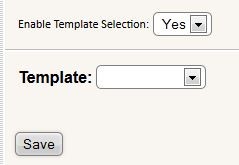 First, you log in as the administrator, and click into the Administration area. Choose “Settings” on the left side of the Admin Area, and then you’ll see the option of “Template Settings”, you’ll click on that. Then you will see a place where you can choose the template you want to work with from the drop down menu. We’re working with template 8 today. Once you’ve done that, you’ll see this screen, which I’ve numbered to match the example above so that you can see which item adjusts which area of the template. Scroll down for details on how to adjust each area:
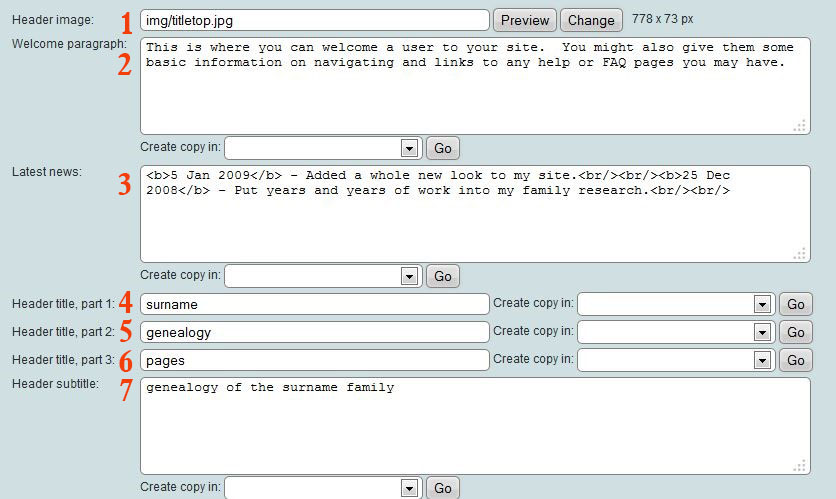
#1 Header Image – this needs to be one image. In the template, several different photos were combined into one file for the header. If you have a photo editing program, you can combine several images in a similar way, or you could just use one image. A wide image that is not very tall works best. For this template, the header image needs to be 778 X 73 pixels.
#2 Welcome Paragraph – This is a place where you can use whatever text you would like to welcome users to your site. It’s a good place to introduce yourself, briefly summarize your research, or invite users to register on the site. The photo that accompanies the welcome paragraph will be a random image selected from the public images on your site and will change every time you load the page. You can use HTML in this area to add links, additional images, or other features. The “Create Copy In” is where you can create other versions of your welcome page in other languages. You can have as many versions as you have languages enabled. If you don’t speak other languages, you can just skip this and your welcome paragraph will always display in the language you use for the first version.
#3 Latest News This is an area where you can update it with any information you would like. It is something you would go in and write, kind of like a miniature blog. We recommend removing old entries so it doesn’t get too long and unwieldy.
#4-6 Name of your site – this is a title where the default is three words strung together with the middle word in a different color. You can change the wording to read anything you would like. If you only want two words, leave one box empty.
#7 Subtitle of your site – this goes underneath the name of your site, and you can make it say anything you want. We recommend a short and memorable tag line.
Scroll down farther and you’ll see the rest of the template options:

#8 (and 11) Mom’s Side Label – This is the text that will display in the left sidebar. It could say “Mom’s Side” or you can change it to say a specific surname, the first name of the wife in the couple running the site, whatever works for you and your situation. Again, there is a “Create Copy In” area where you can make copies of this custom text for any different languages you want to use.
#9 (and 12) Mom’s Side Person ID – this is the ID of the person you want this particular link to go to when the link is clicked. Clicking this link will take the person to a pedigree chart beginning with this person.
#10 (and 13) Mom’s side tree ID – Enter the tree ID here. (You can find the tree ID by looking in the Admin area under “Trees”.) Some people have their whole site in one tree, some have set up multiple trees. Make sure you use the right tree.
# 11-13 are the same as the last three, but with the other side of the family.
#14-15 Side Names – These are subtitles for the different sides. You can use them however you want, but the most common use is to list the two most common surnames in that side. You can just leave these blank if you don’t want subtitles.
Last but certainly not least, do not forget to press the SAVE button before leaving the page!


